0
No products
To be determined
Shipping
$0.00
Total
This item added to your cart. Calculate any delivery cost at next step.
Quantity
Total
There are 0 items in your cart. There is 1 item in your cart.
Total products
If you are doing your research before joining the more than 80,000 customers that have rented our camping and travel gear, or have already received your camping gear rental package from us, here's where you can learn a bit more about the setup and operation of a specific camping or travel gear item before you head out on your next trip. Be prepared!
The information below provides more details on how to adjust and load our high capacity backpack - but we encourage you to give us a call or find more resources online if more details are needed. For more information on this rental item including rates, check out the main product page at Rent Backpack - High Capacity. There are more how-to pages on nearly all of our most popular rental items; find most at our video and user guide to rentals main page .
We have a few different packs for rent that fall into our "high capacity" rental packs. These are for those occasions when we need to carry some extra gear of have something heavy to carry - these will be better suited than any lighter weight pack we rent. If the pictures below don't match up exactly with the packs we sent as part of your rental package, the principles of adjustment and fit are very similar. We mostly carry models from Osprey and Deuter in our high-capacity line, typically in the 65-75 liter range.
Regardless of the size of your pack, when loading your gear, load from the bottom up as light/heavy/light as you go to the top. That is, keep the heaviest items you are carrying - usually food, fuel, tent and water - near the center of the pack and closer to your back. this will keep the load more comfortable for you over the miles you are hiking.
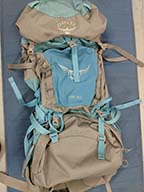
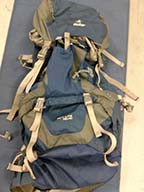
Most of our rental packs have a front 'kangaroo' pouch - flexible mesh holder for wet and dirty things you are lugging around.
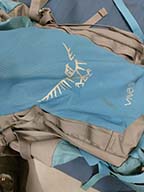
There are loops called 'daisy chains' on most of the packs we rent that allow you to strap gear to the outside. However, you are better off keeping your load size down to the point it will all fit inside the pack, if at all possible.
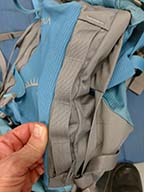
Most of our rental packs have a top compartment called the 'lid'. Keep lightweight and items you need quick access to in these compartments - maps, ID, permits, etc. Usually there are 2 different pockets - one inside and one external to the lid.
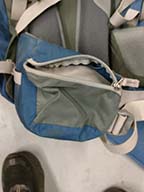
Look for a key retainer in the lid or other compartment - snap it to your car key ring so you can drive away from the trailhead when your trip is over!
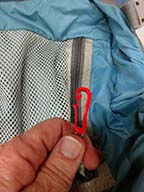
Once your gear is loaded into the pack, use the various cinch straps - most of our rental packs have straps for horizontal and vertical cinching - to keep the load balanced on your back.
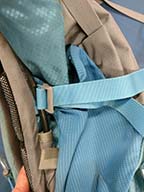
Our rental backpacks can be adjusted for torso length. While not necessarily best for everyone, a good rule of thumb is to have the yoke of the backpack - the slight u-shape that falls between the 2 shoulder straps - to end up about 2 inches below your c-7 vertabrae - the one that sticks out the most at the base of your neck when you bend your head down.
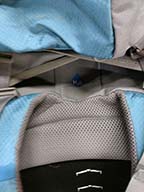
Adjusting the torso length depends on the pack model, but nearly all use an adjustable strap or plate affixed with strong velcro to raise or lower the yoke of the shoulder straps.
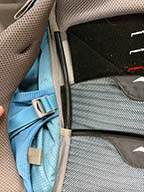
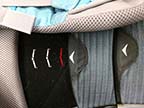
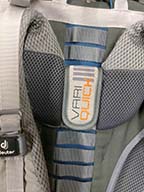
Some of the backpacks we rent have an adjustable waist belt, usually held in place with strong velcro. The pack will be more comfortable if the waist belt extends around you far enough to catch your iliac crest (pointy hip bone). But make sure the belt isn't extended so much that you cannot cinch it tight around your waist. Take advantage of the pockets on the hip belt - a great place for snacks and other quick-access items. When putting on the pack - do it in this order: waist belt / shoulder straps / sternum strap.
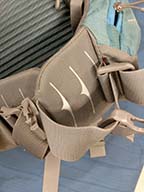
The sternum strap can be adjusted up and down the shoulder straps so it will fit comfortably across your chest. The sternum strap should be the last adjustment, and should not be carrying any of the load - they are designed primarily just to keep the shoulder straps from sliding off your shoulders.
The information below provides more details on how to adjust and load our high capacity backpack - but we encourage you to give us a call or find more resources online if more details are needed. For more information on this rental item including rates, check out the main product page at Rent Backpack - High Capacity. There are more how-to pages on nearly all of our most popular rental items; find most at our video and user guide to rentals main page .
We have a few different packs for rent that fall into our "high capacity" rental packs. These are for those occasions when we need to carry some extra gear of have something heavy to carry - these will be better suited than any lighter weight pack we rent. If the pictures below don't match up exactly with the packs we sent as part of your rental package, the principles of adjustment and fit are very similar. We mostly carry models from Osprey and Deuter in our high-capacity line, typically in the 65-75 liter range.
Regardless of the size of your pack, when loading your gear, load from the bottom up as light/heavy/light as you go to the top. That is, keep the heaviest items you are carrying - usually food, fuel, tent and water - near the center of the pack and closer to your back. this will keep the load more comfortable for you over the miles you are hiking.


Most of our rental packs have a front 'kangaroo' pouch - flexible mesh holder for wet and dirty things you are lugging around.

There are loops called 'daisy chains' on most of the packs we rent that allow you to strap gear to the outside. However, you are better off keeping your load size down to the point it will all fit inside the pack, if at all possible.

Most of our rental packs have a top compartment called the 'lid'. Keep lightweight and items you need quick access to in these compartments - maps, ID, permits, etc. Usually there are 2 different pockets - one inside and one external to the lid.


Look for a key retainer in the lid or other compartment - snap it to your car key ring so you can drive away from the trailhead when your trip is over!

Once your gear is loaded into the pack, use the various cinch straps - most of our rental packs have straps for horizontal and vertical cinching - to keep the load balanced on your back.

Our rental backpacks can be adjusted for torso length. While not necessarily best for everyone, a good rule of thumb is to have the yoke of the backpack - the slight u-shape that falls between the 2 shoulder straps - to end up about 2 inches below your c-7 vertabrae - the one that sticks out the most at the base of your neck when you bend your head down.

Adjusting the torso length depends on the pack model, but nearly all use an adjustable strap or plate affixed with strong velcro to raise or lower the yoke of the shoulder straps.


Some of the backpacks we rent have an adjustable waist belt, usually held in place with strong velcro. The pack will be more comfortable if the waist belt extends around you far enough to catch your iliac crest (pointy hip bone). But make sure the belt isn't extended so much that you cannot cinch it tight around your waist. Take advantage of the pockets on the hip belt - a great place for snacks and other quick-access items. When putting on the pack - do it in this order: waist belt / shoulder straps / sternum strap.

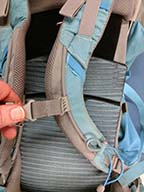
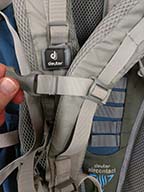
The sternum strap can be adjusted up and down the shoulder straps so it will fit comfortably across your chest. The sternum strap should be the last adjustment, and should not be carrying any of the load - they are designed primarily just to keep the shoulder straps from sliding off your shoulders.


